
This detailed guide provides a complete, practical, buyer-focused approval framework for a pre-production cosmetic bag sample. It covers dimensions, materials, color, logo, zippers, hardware, internal structure, workmanship, function, packaging, documentation, and change control. The goal is to create a clear, objective, traceable, production-ready “golden sample” that the factory, buyer, inspector, and retail team can all consistently use as the same measurable, documented, production-ready standard.
What Is a Pre-Production Cosmetic Bag Sample?
A pre-production sample, often shortened to PPS, is a finished sample made after the design, materials, dimensions, construction, logo, and packaging have been substantially finalized. It should use production-intent materials and processes. Once approved, it becomes a physical reference for mass production and final inspection.
A PPS is not the same as an early prototype. A prototype answers questions such as “Does this shape work?” or “Can the factory construct this idea?” A PPS answers a different question: “Is this exact version ready to reproduce in bulk?” A sales sample may be made for photography or retailer presentation and can sometimes serve as a PPS, but only if every component and specification matches production.
| Sample Type | Main Purpose | Materials | Approval Status |
|---|---|---|---|
| Concept mockup | Confirm visual direction and approximate scale | May be substituted | Not a production standard |
| Prototype | Test shape, construction, and capacity | May include close alternatives | Development stage |
| Logo strike-off | Approve print, foil, embroidery, or metal plate | Actual or representative substrate | Component approval only |
| Pre-production sample | Approve complete production-intent bag | Should be actual bulk materials | Becomes golden sample after sign-off |
| Production sample | Verify goods taken from the line or finished lot | Bulk production materials | Confirms production consistency |
| Shipment sample | Retain reference from shipped goods | Final bulk product | After-production record |
Why Pre-Production Cosmetic Bag Sample Approval Matters
Grand View Research projects the global bags and containers market to reach more than USD 62 billion by 2030. As beauty, travel, gifting, and reusable packaging programs expand, brands source more complex pouches with custom components, internal organization, premium finishes, and market-specific packaging. Each added component creates another approval point. [External source: Grand View Research]
A signed PPS reduces ambiguity in four ways. First, it confirms that the written tech pack can be translated into a physical product. Second, it reveals interactions that drawings cannot show, such as zipper tension and fabric drape. Third, it gives production teams a clear visual workmanship standard. Fourth, it gives inspectors evidence for defect decisions.
Approval does not remove the supplier’s responsibility to meet the purchase order, compliance requirements, and agreed quality standard. It also does not excuse hidden defects. The PPS supplements written specifications; it does not replace them.
Pros and Cons of Requiring a Full PPS
Pros: a complete PPS aligns appearance, function, workmanship, and packaging before irreversible production steps. It reduces disputes and gives inspectors a physical standard. Cons: making the final sample can add time and cost, particularly when custom materials or tooling are not yet ready. Skipping it may appear faster, but the saved days are small compared with the risk of reworking or replacing a bulk order.
Step 1: Approve Shape and Dimensions
Define Measurement Points
A dimension without a measurement method is incomplete. A soft pouch may measure differently when empty, flattened, standing, or lightly filled. The tech pack should show exactly where length, height, width, gusset, and opening are measured. For curved bags, identify tangent points or fixed seam intersections.
Check Proportion, Not Only Numbers
Two samples can meet the same external dimensions but look different because the corner radius, gusset angle, zipper path, padding, or seam allowance differs. Review front, side, top, bottom, open, and filled views. Compare symmetry and whether the bag stands as intended.
Set Tolerances
Use realistic tolerances based on size, material, and construction. A heat-welded flat pouch may support tighter dimensions than a soft quilted vanity bag. Avoid one universal tolerance for every component. Critical fit dimensions, such as a bottle pocket or retail box, may need tighter control than overall soft-bag width.
| Measurement | What to Confirm | Common Error |
|---|---|---|
| Overall length/height | Finished seam-to-seam method | Factory measures panel before assembly |
| Gusset/depth | Flattened or standing condition | Different methods produce different results |
| Zipper opening | Usable opening, not chain length only | Contents cannot pass through opening |
| Handle/strap | Finished drop and attachment points | Measured before folding or stitching |
| Internal pocket | Usable size after seam allowance | Specified panel size is mistaken for capacity |
| Logo position | Reference from finished edges or centerline | Centered on cut panel but not finished bag |
Step 2: Approve Materials and Color
Main Material
Confirm fiber or polymer type, weight or thickness, weave, grain, coating, finish, softness, transparency, and direction. “Black nylon” is insufficient because 70D, 210D, 420D, and 600D fabrics create different weight and structure. “PU leather” does not define backing, thickness, grain, hydrolysis resistance, or gloss.
Lining and Interlining
Approve the lining color, coating side, hand feel, cleaning performance, and whether it is free-floating or bonded. Check foam, EPE, batting, cardboard, PP sheet, EVA, or other reinforcement. The thickness of hidden layers directly affects external dimensions and capacity.
Color
Compare the sample with approved physical standards under relevant lighting. Pantone is a communication tool, but the PPS should show the approved color on the actual material. Cross-material components may need coordinated rather than identical shades.
Material Lot Risk
Ask whether the PPS uses material from the reserved production lot. If not, the approval should state that bulk material requires a separate swatch or incoming-material confirmation. This is particularly important for custom-dyed fabric, washed textiles, transparent films, recycled fibers, and plated hardware.
Step 3: Approve Logo and Branding
Check artwork, size, location, color, finish, line clarity, and durability. The logo must be evaluated on the finished bag because seams, curvature, padding, and visual center can change its appearance.
| Method | Approve | Test |
|---|---|---|
| Screen print | Opacity, registration, edge sharpness, color | Rub, adhesion, flex, migration |
| Foil stamp | Coverage, metallic tone, impression depth | Rub and repeated flexing |
| Embroidery | Thread colors, stitch density, backing, puckering | Thread security and colorfastness |
| Metal plate | Shape, engraving, plating, position, backing | Pull, scratch, corrosion, sharp-edge check |
| Woven label | Artwork, fold, edge, sewing position | Attachment and fraying |
Provide vector artwork and retain a signed strike-off when the logo is technically complex. For metal or molded components, confirm who owns the tooling and whether the PPS uses the final production mold.
Step 4: Approve Zippers and Hardware
Zipper
Confirm chain type, size, tape color, slider, locking behavior, puller, stops, and finished length. Operate the zipper with the bag empty and filled. Check every curve, especially where padding or binding creates pressure.
Metal Hardware
Compare plating across pullers, plates, rivets, buckles, and rings. Exact identity may be impossible across substrates, but the set should look intentional. Inspect sharp edges, burrs, scratches, lacquer, attachment, and potential contact with lining or contents.
Magnets, Snaps, and Buckles
Check holding force and alignment. A magnet that feels strong in a flat sample may be weak through thick padding. A snap can distort soft fabric without reinforcement. A buckle may function but twist the strap because of incorrect width.
| Stage | Action | Evidence |
|---|---|---|
| Component board | Approve type, color, and finish | Signed hardware card |
| Constructed sample | Check operation and balance | PPS comments and video |
| Functional test | Apply cycles, load, or pull | Test record |
| Packaging trial | Check scratching and pressure marks | Packed sample |
| Bulk inspection | Compare against approved standard | AQL report |
Step 5: Approve the Interior Structure
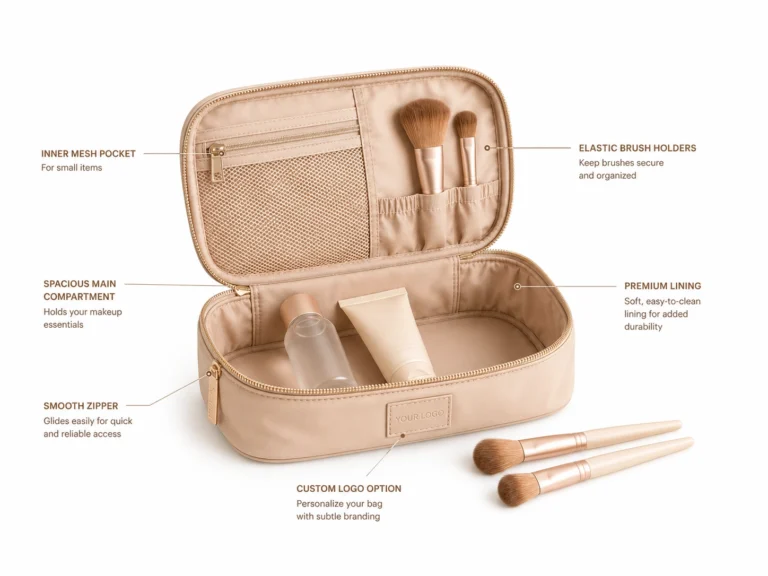
Interior organization should be tested with real products. Check pocket width, depth, elastic recovery, brush-loop diameter, divider stiffness, mesh tension, bottle orientation, and whether closures remain accessible. A photograph of an empty interior cannot confirm function.
Questions to Ask
- Can the largest intended product pass through the opening?
- Do bottles remain upright when the bag is carried?
- Do brush bristles touch the zipper or lining?
- Does an elastic loop grip the product without deforming it?
- Can consumers see and reach small items?
- Does a removable pouch attach securely and release easily?
- Do dividers reduce useful capacity more than expected?
Step 6: Approve Workmanship
The PPS should define the acceptable appearance of stitching, binding, quilting, edge paint, welding, reinforcement, thread trimming, and panel alignment. Do not approve a sample with known workmanship defects on the assumption that bulk will be better. Production teams may treat every visible feature of the signed sample as acceptable.
| Area | Acceptable Standard | Unacceptable Example |
|---|---|---|
| Stitching | Even density, secure backtack, no skips | Broken or visibly wandering seam |
| Binding | Raw edge fully enclosed | Exposed film or fabric edge |
| Shape | Symmetrical and stable | Twisted body or collapsed corner |
| Quilting | Pattern aligned within agreed tolerance | Uneven channels or missed stitches |
| Weld | Continuous width without bubbles | Burn-through or incomplete fusion |
| Cleanliness | No visible oil, glue, mold, or permanent marks | Contamination or strong abnormal odor |
Step 7: Approve Product Function
Perform a realistic use trial. Fill the bag to approved capacity. Open and close it repeatedly. Carry it by the handle. Place it in the intended retail box or shipping pack. Wipe the lining with representative cosmetics. Check whether the bag tips, collapses, or becomes difficult to close.
For high-risk programs, reference recognized methods. ASTM D2061 covers zipper and zipper-part strength. ISO 13935-2:2026 covers a grab method for seam rupture in fabrics and made-up textile articles. A laboratory can adapt relevant tests to the product specification. [External source: ASTM D2061] [External source: ISO 13935-2:2026]
Step 8: Approve Packaging and Labeling
Confirm how the bag is shaped, stuffed, folded, protected, labeled, and packed. Packaging can change the product. Tight folding may crease PVC, crush padding, scratch metal plates, deform bows, or transfer dark print onto pale PU.
- Polybag or paper sleeve dimensions and material
- Protective tissue, foam, film, or hardware wrap
- Hangtag, barcode, care label, and country-of-origin marking
- Folding direction and stuffing material
- Units per carton and packing orientation
- Carton dimensions, weight, and marks
- Retail box fit and e-commerce drop protection
How to Document Pre-Production Cosmetic Bag Sample Approval
Use a Consolidated Comment Sheet
Number every change. Include a photograph, exact location, required correction, responsible party, and approval status. Avoid scattered instructions across email, messaging apps, annotated screenshots, and calls. The final sheet should supersede earlier comments.
Approve With Conditions Only When Necessary
A conditional approval should identify the precise change that may be made without another full sample. For example: “Approved subject to changing zipper tape to approved swatch ZT-04; no other changes allowed.” Broad statements such as “looks fine, improve workmanship in bulk” are not controlled approvals.
Seal and Retain Samples
Buyer and factory should retain matching signed samples when practical. Mark style, color, date, revision, and approver. Photograph all sides and key measurements. For long programs, protect samples from fading, dust, deformation, and hardware oxidation.
| Field | Required Information |
|---|---|
| Style identification | Product name, style number, color, revision |
| Specification set | Tech-pack version and BOM version |
| Materials | Approved codes, lots, or swatches |
| Open comments | None, or clearly listed conditional items |
| Approvers | Buyer, supplier, and relevant technical owner |
| Date | Approval date and production authorization |
| Change rule | No substitution without written approval |
Run a Formal Pre-Production Meeting
Before cutting bulk material, the buyer-facing merchandiser, pattern technician, production supervisor, quality team, and relevant subcontractors should review the approved sample and specification together. The meeting should confirm high-risk points: color lots, logo position, zipper path, hardware attachment, critical dimensions, testing, and packaging. A signed meeting record prevents information from stopping at the sales contact.
Use the PPS to demonstrate workmanship, but use the tech pack to explain hidden and measurable requirements. Mark any intentional asymmetry, natural material variation, hand-finished effect, or acceptable shade range. For outsourced processes such as embroidery, foil, plating, printing, or washing, provide the subcontractor with the exact approved component standard.
Control the Gap Between PPS and Bulk Materials
Sometimes the PPS is made before the full production material lot exists. In that case, add a material approval gate. The factory should submit bulk fabric, PU, PVC, TPU, zipper tape, and hardware finish swatches before cutting. Compare them with the PPS and signed component standards. Record approvals by lot number where possible.
Do not allow a supplier to substitute a “closest available” material to protect the delivery date without written authorization. A seemingly minor change can alter stitching, welding, color, structure, odor, chemical compliance, or carton weight. When a substitution is necessary, assess whether a component swatch is sufficient or a revised PPS is required.
Create a Production-Ready Photo Standard
Photograph the approved PPS on a neutral background from all sides, open and closed, empty and filled. Include close-ups of logo, zipper ends, seams, interior pockets, labels, and packaging. Add a ruler or annotated dimension only where it clarifies the specification. Photos help line workers and inspectors, but they should reference the signed sample and current revision rather than replace them.
Store images in one controlled folder with unambiguous names. Remove superseded versions from active production channels. When a repeat order begins months later, verify that the physical PPS has not faded, oxidized, or deformed in storage.
Anonymized Factory Case: The Sample Was “Approved,” but the Size Was Not
A brand approved a soft rectangular makeup pouch from photographs. The stated width was 25 cm, but the drawing did not show whether this meant the flat top edge, the widest body point, or the finished seam-to-seam base. The supplier measured the cut panel, while the buyer measured the finished filled pouch.
During pilot production, the retail carton fit failed by several millimeters. The pouch itself looked close to the approved photo, but the measurement method had never been agreed. The team stopped production, created a diagram with fixed measurement points, revised the gusset, and approved a physical carton-fit sample.
The corrective action cost time, but it prevented a complete retail-packaging failure. The case demonstrates that an approved appearance is not an approved specification. Every critical dimension needs a method, tolerance, and use-case check.
Frequently Asked Questions
What is a pre-production sample?
It is a finished production-intent sample made before mass production. It should use the approved material, color, construction, logo, hardware, and packaging. After written sign-off, it becomes the physical reference for production and inspection.
Is a PPS the same as a prototype?
No. A prototype explores design and manufacturability and may use substitute materials. A PPS confirms the final version ready for bulk production. Some simple products may move quickly between stages, but the approval purpose remains different.
Can mass production begin before PPS approval?
It can, but the buyer accepts significant risk. Material booking may occur before final approval, but cutting and assembly should normally wait until critical specifications are signed. If schedule pressure requires an exception, document which elements are frozen and who accepts the risk.
What should buyers check first?
Start with product identity, dimensions, material, color, and construction because these are difficult to change after cutting. Then review logo, hardware, internal details, workmanship, function, packaging, and documentation.
How many PPS samples should be made?
Enough to support buyer approval, factory retention, testing, photography, and retailer review. Two matching signed samples—one for buyer and one for factory—are a practical minimum for many programs. More may be needed for multiple offices or destructive testing.
Can the factory substitute material after PPS approval?
Not without written buyer approval. Even a “similar” material can change color, hand feel, cost, compliance, sewing, welding, or durability. The change should be documented and may require a revised sample or at least a signed component swatch.
What is a golden sample?
A golden sample is the final approved physical standard used to judge production. It should be signed, dated, identified by revision, and protected from unauthorized alteration. Written specifications remain authoritative for hidden, measurable, or compliance requirements.
Expert Recommendation, CTA, and Future Trend
Treat pre-production cosmetic bag sample approval as a formal controlled technical release, not a quick visual thumbs-up. Approve measurement methods, materials, color, logo, zipper, hardware, interior structure, workmanship, function, packaging, and change control. Keep written specifications and physical samples aligned.
Future sample approval will use 3D files, digital measurement overlays, shared revision platforms, spectral color data, automated comment tracking, and video-recorded function tests. These tools will accelerate decisions, improve accountability, and reduce version errors, but physical samples will remain essential for hand feel, drape, zipper operation, structure, and cross-material color.
For a production-ready sample, send your reference images, dimensions, material, quantity, logo artwork, target market, packing, and deadline to Bling Accessory. A clear sample checklist, signed component standards, and consolidated approval record can prevent expensive corrections, schedule disruption, retailer disputes, and unnecessary rework after bulk materials are booked or cut.